Always last to jump on a bandwagon (or anything for that matter - I didn't realise I had to do anything with my eyebrows until I was well into my 20s, and dealing with bushy eyebrows is no bandwagon issue), I have only recently come across Anna Jones. Friend and erstwhile employee of Jamie Oliver; Slender of leg, blonde of hair, vegetarian wholefood enthusiast...
You might have thought I'd be more than a little dismissive. I am, after all the person who sent Deliciously Ella back whence it came (my mum) a few short months ago for reasons too numerous to mention (oh, OK then - I found it irritatingly smug, couldn't connect to the writing style or the writer, there was, frankly, far too much quinoa in the first few pages for her to be credible, and what I really wanted was Diana Henry's 'A Bird in the Hand' but obviously I hadn't been hinting hard enough.)
But we're not talking about Deliciously Ella or A Bird in the Hand (although I will return to Diana Henry in a later blog). We're talking about Anna Jones and A Modern Way to Cook and, swoon, my latest food crush.
I'm never going to be a vegetarian but I flirt with reducing the amount of meat in our diet for numerous reasons. I am conscious that there are calories and there are calories and I need to make them count. A Modern Way to Cook seems to tick both boxes. There are many vegetarian cookery books that I've tried and enjoyed but are very cream and cheese laden, thus defeating the object of my latest quest to make my calories count in the right way. Anna Jones' approach to food seems to be easy and straightforward. Ditch the refined sugar, choose alternatives to dairy, cut out the meat. Yes, my cupboards now groan with a wider selection of pulses and unrefined sugar options (Agave syrup, anyone) but get your head around that and you're laughing. And feeling lighter and generally more energetic. Really. Couple this shift in culinary preferences with a surprisingly successful Dry January and I'm feeling perkier than I can ever remember for this time of year which usually drags me right down. To top it all - and probably crucial to this feeling of well being - is that I don't feel like I've been hard done by in the food department. AND I'm half a stone lighter than I was at the end of December.
So what have I cooked? Admittedly, I've majored on the baking section in A Modern Way to Eat - I am after all trying to lose a bit of weight, but I love a treat, so if I can make the contents of my cake tins healthier, that's got to be a good thing. There's a totally divine 'Ultimate Pecan Banana Bread' combining bananas, oats, pecans, maple syrup - as a connoisseur of banana loaf this comes in very close to the top of my list of banana loaves to bake;
A Carrot Cake Flapjack which somehow combines the best of both carrot cake and flapjack without eggs, flour or refined sugar;
Dark Chocolate Goodness Cookies - who would have believed you could use cannellini beans to such amazing effect?! If you've read any of my blog before, you'll know how much of a cake fan I am. Of course, these don't taste the same as my usual bakes, but different is good, and I am converted.
I served up celeriac, bay and mushroom ragu the other evening - it disappeared. And if comfort food is what you need, rhubarb apple and maple pan crumble is a revelation - scrummy crumble topping with none of the heaviness to leave you groaning afterwards for hours...
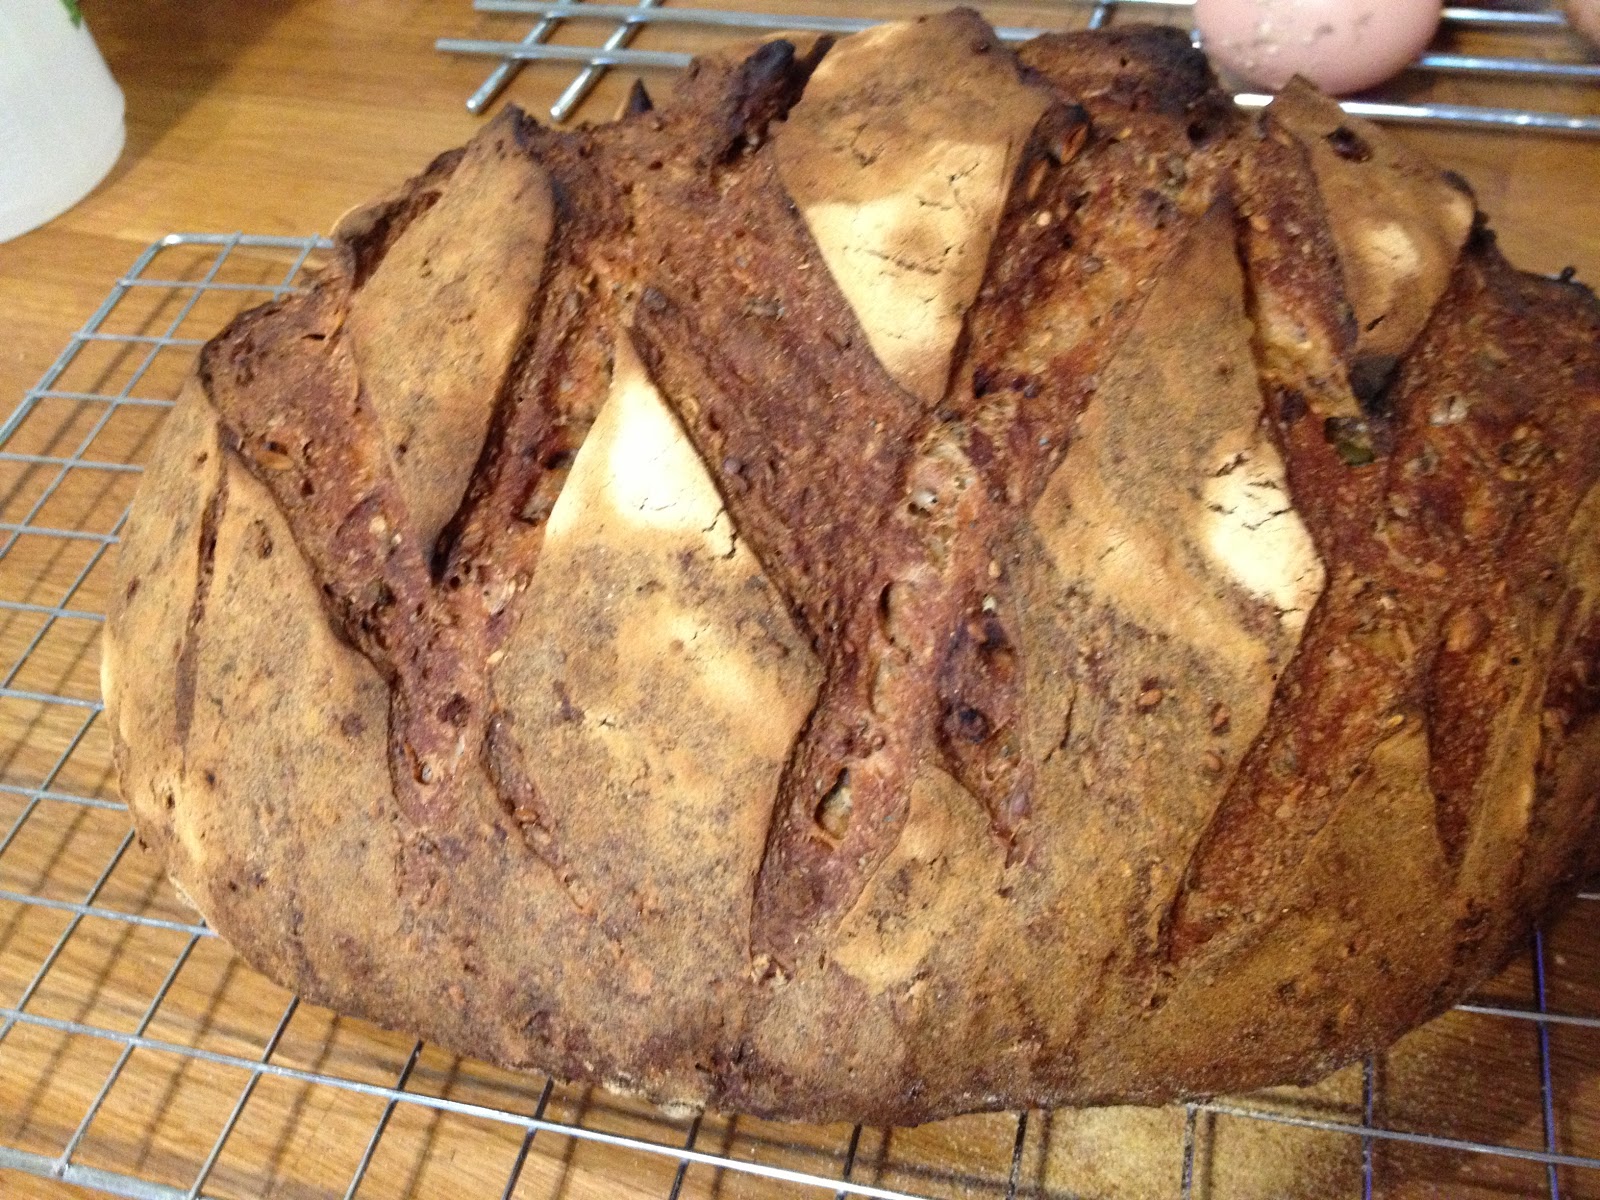
Honeyed rye bread was delicious (despite a slightly over-enthusiastic crust - it's a few months since I've baked bread and I need to get my mojo back) especially topped with avocado and roasted tomatoes with a cheeky fried egg on the side.
And if this is all seeming like it's too good to be true, well, I have had one disaster. I made some lush kale pesto (inspired by lunch in a local cafe, of which more another time) and decided to 'knock up' some chick pea pasta - from A Modern Way to Cook - to serve it with. The very idea of 'knocking up' fresh pasta, chickpea or otherwise, on a week night when I was tried from work and had hungry mouths to feed, shows just how much confidence Ms Jones had instilled in me. Of course I ended up with a sticky unworkable disaster that I had to chuck away before reaching for the dried pasta. But I feel this was probably more down to user error than anything else. My chickpea flour was somewhat old, and I didn't have ground flax seed as required, so tried to whizz up ordinary flax seed in a food processor to use instead. Disaster, disaster, but I will try it again another day.
There are still plenty of the recipes in A Modern Way to Cook that feel a little too worthy for me, a step too far down the road to kale oblivion, but I'm getting over that. Anna Jones puts together really delicious flavour combinations, and her useful charts suggesting combinations for salads and the like are worth digesting (pun intended). My meal plan for this week includes lentils with roast tomatoes and horseradish, and I can't wait to try frying pan Turkish flatbreads with spoon salad. Some of the ingredients are something of a challenge to locate here in very rural West Wales, but there are ways around that. In the same way that Nigella seems to instil the confidence to experiment, so I feel I can enter our local health food shop, Go Mango in Cardigan, with my head held high and ask if they might possibly stock freekeh...
So, in conclusion, A Modern Way to Eat - definitely worth a read. Certainly worth an experiment. A worthy addition to any shelf of cookery books. But you probably already knew that, didn't you...
Showing posts with label bread. Show all posts
Sunday, 31 January 2016
Wednesday, 25 February 2015
Bread by any other name
I haven't been baking much bread recently, at least not in the conventional sense. Bread is something I do tend to go through phases with, and I'm in a 'not baking bread' phase, which I feel a little uncomfortable about, but there we go. We're not eating that much conventional bread day to day. The kids prefer wraps rather than traditional sandwiches, and, despite everything Hugh Fearnley-Whittingstall says, I'm just not up for knocking up tortillas that would undoubtedly be declared substandard when presented to them for packed lunch.
The Husband has been taking soup to work rather than sandwiches too, and frankly if there's bread in the house, I just eat it. All. Toasted and spread thickly with peanut butter. So it's better if there isn't any knocking around at all.
But there are occasions when bread of sorts is required, and to that end I've been resorting to the quick breads that don't require any kind of leavening agent, or if they do, rely on the cake maker's friends. baking powder and bicarbonate of soda. Soda bread, corn bread, naans. All delicious in their own way, all really simple and easy. Not bread in the satisfying knead, prove, bake sense, but good nonetheless.
Oatmeal & Honey Soda Bread
300g plain white flour
200g medium oatmeal, plus extra for sprinkling
2 tsp salt
2 tsp baking powder
1 tsp bicarbonate of soda
200g clear honey
200ml plain yoghurt
100 ml milk
Pre-heat the oven to 200C.
Rub a little oil over a baking sheet and sprinkle over some extra oatmeal.
Combine the flour, oatmeal, salt and raising agents in a bowl, measure in the honey and then combine the yoghurt and milk and mix this together to make a dough.
Turn out onto your work surface, knead briefly, then form into a round and pat down till it's about 5cm thick. Place on the prepared baking sheet.
Score a cross into the top of the dough and scatter over some more oatmeal, then bake in the oven until the loaf sounds hollow when tapped on the bottom - around 20-25 minutes.
Leave to cool a little on a rack, but to enjoy at its best, leave the breath of the oven on the loaf before consuming.
The Husband has been taking soup to work rather than sandwiches too, and frankly if there's bread in the house, I just eat it. All. Toasted and spread thickly with peanut butter. So it's better if there isn't any knocking around at all.
But there are occasions when bread of sorts is required, and to that end I've been resorting to the quick breads that don't require any kind of leavening agent, or if they do, rely on the cake maker's friends. baking powder and bicarbonate of soda. Soda bread, corn bread, naans. All delicious in their own way, all really simple and easy. Not bread in the satisfying knead, prove, bake sense, but good nonetheless.
Oatmeal & Honey Soda Bread
300g plain white flour
200g medium oatmeal, plus extra for sprinkling
2 tsp salt
2 tsp baking powder
1 tsp bicarbonate of soda
200g clear honey
200ml plain yoghurt
100 ml milk
Pre-heat the oven to 200C.
Rub a little oil over a baking sheet and sprinkle over some extra oatmeal.
Combine the flour, oatmeal, salt and raising agents in a bowl, measure in the honey and then combine the yoghurt and milk and mix this together to make a dough.
Turn out onto your work surface, knead briefly, then form into a round and pat down till it's about 5cm thick. Place on the prepared baking sheet.
Score a cross into the top of the dough and scatter over some more oatmeal, then bake in the oven until the loaf sounds hollow when tapped on the bottom - around 20-25 minutes.
Sunday, 14 December 2014
Stollen
What a difference a day - and a trip to the shops makes. Presents have been purchased, the tree is up and there is food in the fridge. The Husband is returned from his last week away of the year. And lo! Christmas can begin.
I'm not a huge Christmas fiend in the way that some people are - seeing Christmas adverts in September makes me groan, and I can't get worked really up about it - piling too many expectations into one day is a sure fire recipe for disaster. But I do like having time to be with family, to catch up with friends, to switch off. I love a good carol, a 'Christmas film' - either one that's themed around Christmas, or failing that, the Sound of Music. As the kids have grown older, we're developing our own traditions - different from those of the Husband & my own childhoods (the Husband was never going to let me maintain the tradition of not opening 'main' presents till AFTER the Queen's speech, which is what happened in our house when I was a child...)
But I don't think of myself as a Christmas purist - more a bit of a Christmas pirate, and I'll pick and choose from new ideas, mostly happy to go with the flow, and frankly, when the traditions of other Christmases are so tasty why wouldn't you? In the interests of making sure we have the means for a bit of a party next weekend, I have been trying out various drink options of the mulled variety (hic), and I made a stollen.
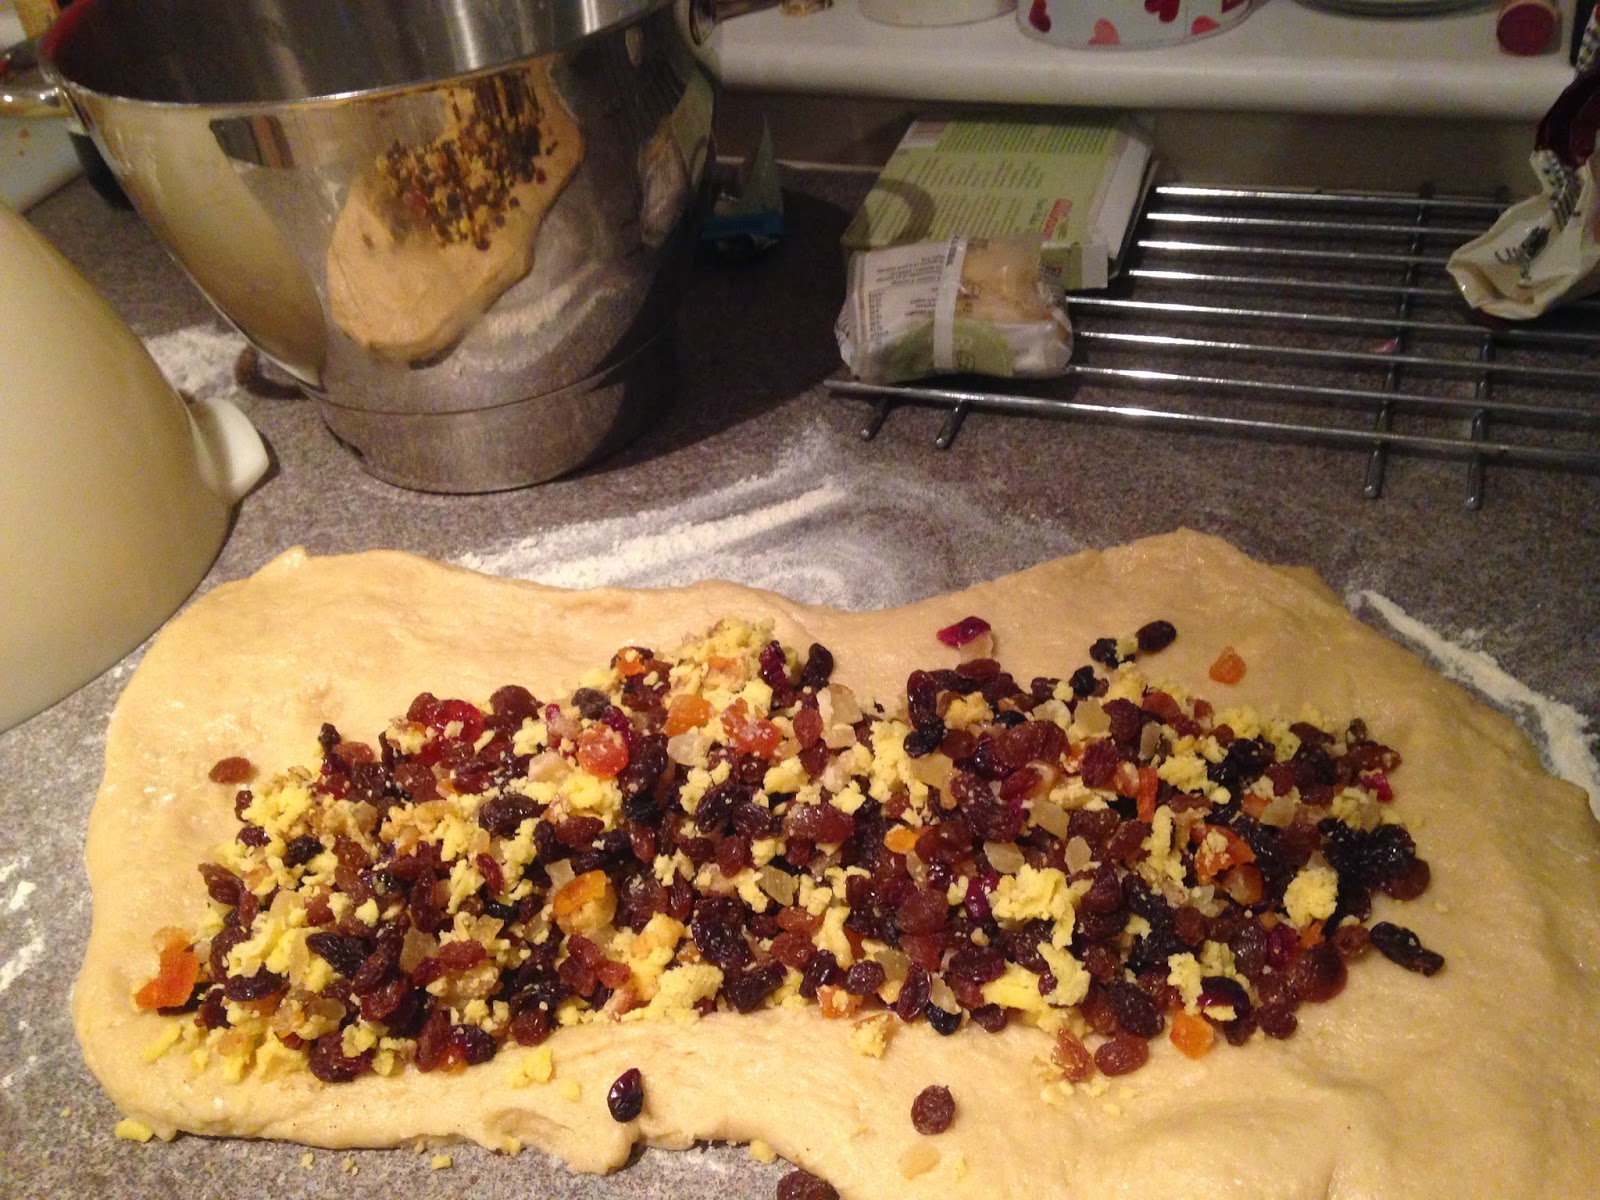
Stollen is, I think German/Austrian in origin but for the opportunities it presents for Marzipan, it's a winner for me. I've never made one before, and only occasionally eaten it (there's lots of other things to eat at Christmas, aren't there?), but having had a go, I can see this becoming a bit of a fixture. I mean what is not to like? Enriched bread dough, all those Christmassy spices and of course, marzipan... I ate it unadorned for breakfast this morning in a quiet house (the Husband took the kids off kayaking) with a cup of coffee. The marzipan melted into the dough, a sugary hit from the icing sugar drenched over the rop, plenty of dried fruit, turning it immediately into a health food...Bliss.
I wouldn't begin to suggest this is an authentic recipe - I started off with a Paul Hollywood version and went from there - but I think in terms of flavour and sheer Christmassy food joy, it hits the spot.
Stollen
250 semi-skimmed milk
150g unsalted butter, at room temperature, cut into cubes
500g strong white flour
100g caster sugar
10g dried easy blend yeast
10g salt
400g dried fruit (I used a bag of luxury dried fruit mix left over from the Christmas cake)
130g marzipan, grated
2 good shakes of ground all spice
1/2 tsp vanilla extract
1/4 tsp almond extract
To finish
25g unsalted butter
1 tbsp icing sugar
a good handful of flaked almonds
You'll need a lined baking sheet and a seive to sift the final icing sugar over the hot loaf.
Warm the milk in a small pan then remove from the heat and add the butter and allow it to melt in to the milk.
Combine the stong white flour, sugar, yeast and salt in a bowl, then gradually incorporate the milk/butter mixture. Once combined into a rough dough, knead until you have a smooth dough (I did this in a food processor with the dough hook)
Combine the dried fruit, marzipan, all spice and vanilla & almond extracts in a bowl.
Flour the work surface (again if you kneaded by hand and it's necessary) and pat the dough into a rough rectangle, then carefully tip the fruit mixture onto it and knead it all together. You may think the fruit will never incorporate into the dough, but it will - just go steadily!
Once the fruit is incorporated into the dough, place the dough in a bowl, cover with cling film and leave to rise for 1-2 hours or until doubled in size.
Pre-heat the oven to 190C (170C Fan). Tip the dough onto a floured work surface, form into a rectangle, about 30 cm by 20 cm, then roll tightly into a sausage shape, and place on the lined baking sheet. Cover with a tea towel and leave for 30 mins-1 hour.
Remove the tea towel, put the loaf in the oven and bake for 50 mins-1 hour. Keep an eye on it and cover with foil if it looks like it's catching.
Just before you take the stollen out of the oven, melt the final 25g of butter. Remove the stollen from the oven, brush it with the melted butter then chuck the flaked almonds over it, then sift the icing sugar over the top and leave to cool completely.
Christmas? Bring it on.
I'm not a huge Christmas fiend in the way that some people are - seeing Christmas adverts in September makes me groan, and I can't get worked really up about it - piling too many expectations into one day is a sure fire recipe for disaster. But I do like having time to be with family, to catch up with friends, to switch off. I love a good carol, a 'Christmas film' - either one that's themed around Christmas, or failing that, the Sound of Music. As the kids have grown older, we're developing our own traditions - different from those of the Husband & my own childhoods (the Husband was never going to let me maintain the tradition of not opening 'main' presents till AFTER the Queen's speech, which is what happened in our house when I was a child...)
But I don't think of myself as a Christmas purist - more a bit of a Christmas pirate, and I'll pick and choose from new ideas, mostly happy to go with the flow, and frankly, when the traditions of other Christmases are so tasty why wouldn't you? In the interests of making sure we have the means for a bit of a party next weekend, I have been trying out various drink options of the mulled variety (hic), and I made a stollen.
Stollen is, I think German/Austrian in origin but for the opportunities it presents for Marzipan, it's a winner for me. I've never made one before, and only occasionally eaten it (there's lots of other things to eat at Christmas, aren't there?), but having had a go, I can see this becoming a bit of a fixture. I mean what is not to like? Enriched bread dough, all those Christmassy spices and of course, marzipan... I ate it unadorned for breakfast this morning in a quiet house (the Husband took the kids off kayaking) with a cup of coffee. The marzipan melted into the dough, a sugary hit from the icing sugar drenched over the rop, plenty of dried fruit, turning it immediately into a health food...Bliss.
I wouldn't begin to suggest this is an authentic recipe - I started off with a Paul Hollywood version and went from there - but I think in terms of flavour and sheer Christmassy food joy, it hits the spot.
Stollen
250 semi-skimmed milk
150g unsalted butter, at room temperature, cut into cubes
500g strong white flour
100g caster sugar
10g dried easy blend yeast
10g salt
400g dried fruit (I used a bag of luxury dried fruit mix left over from the Christmas cake)
130g marzipan, grated
2 good shakes of ground all spice
1/2 tsp vanilla extract
1/4 tsp almond extract
To finish
25g unsalted butter
1 tbsp icing sugar
a good handful of flaked almonds
You'll need a lined baking sheet and a seive to sift the final icing sugar over the hot loaf.
Warm the milk in a small pan then remove from the heat and add the butter and allow it to melt in to the milk.
Combine the stong white flour, sugar, yeast and salt in a bowl, then gradually incorporate the milk/butter mixture. Once combined into a rough dough, knead until you have a smooth dough (I did this in a food processor with the dough hook)
Combine the dried fruit, marzipan, all spice and vanilla & almond extracts in a bowl.
Flour the work surface (again if you kneaded by hand and it's necessary) and pat the dough into a rough rectangle, then carefully tip the fruit mixture onto it and knead it all together. You may think the fruit will never incorporate into the dough, but it will - just go steadily!
Once the fruit is incorporated into the dough, place the dough in a bowl, cover with cling film and leave to rise for 1-2 hours or until doubled in size.
Pre-heat the oven to 190C (170C Fan). Tip the dough onto a floured work surface, form into a rectangle, about 30 cm by 20 cm, then roll tightly into a sausage shape, and place on the lined baking sheet. Cover with a tea towel and leave for 30 mins-1 hour.
Remove the tea towel, put the loaf in the oven and bake for 50 mins-1 hour. Keep an eye on it and cover with foil if it looks like it's catching.
Just before you take the stollen out of the oven, melt the final 25g of butter. Remove the stollen from the oven, brush it with the melted butter then chuck the flaked almonds over it, then sift the icing sugar over the top and leave to cool completely.
Christmas? Bring it on.
Thursday, 3 July 2014
No-Knead Bread
When I was on a bread making course recently, one of the other particpants was raving about how he used a variation of the method to make fail-safe and fantastic pizza dough.
Dom, at Belleau Kitchen, one of my favourite blog crushes swears by an 'almost no knead' method - similar to the one the pizza maker was swearing by, and to top it all, I made some amazing 'Cardigan Bay Buns', quickly followed by a loaf of white bread all using a low knead method whereby you mix the ingredients together, then knead for no more than 10 seconds 3-4 times over a 40 minute period, then leave to prove.
Easy, and great bread, but it turns out there is a further refinement- or perhaps it's less refinement, more back to basics - a 'completely no knead' method of making bread, which not only involves absolutely no kneading, but also a rather neat and dinky method of baking, 'dutch oven style' - in a heavy, cast iron casserole which appealed to my inner-desire to break conventions in a not very rebellious way at all. Rock & roll.
Anyway, no knead it is, and makes life very much easier. You literally stir together your usual bread ingredients, cover and leave for 12 hours, then shape the loavf and leave to prove for another 1-2 hours before baking in a dutch oven/covered cast iron dish. I've started making up the dough early evening and leaving overnight, then forming the dough when I get up (ish - I don't want to give a picture of early morning efficiency) before baking once I've got back from taking the kids to school and walking to dog. The timings work just right. I've made this with strong white and wholemeal flour and it works with both. In fact, the wholemeal loaf was certainly the best looking wholemeal loaf I've ever made.
For 2 loaves
1kg strong white flour
2 sachets easy blend yeast
20g sea salt
650-800ml water
Stir together all the ingredients, adding the water steadily until you've got a scraggy dough.
Cover the bowl with clingfilm and set aside for 12-18 hours.
Flour the worksurface, divide the dough into 2 equal pieces and form into loaves using proving baskets, loaf tins as you like.
Cover loosely and leave to prove for 1-2 hours until doubled in size.
Get your baking receptacle with lid on. I've found a 20cm diameter round Le Creuset works for one round loaf. Place it in a cold oven, then turn on to 230C and leave to pre-heat.
When you're ready to bake, get oven gloves on (believe me, tea towels aren't thick enough) remove the baking pot out of the oven, take off the lid, sprinkle some flour in to cover the base of the pot, then carefully transfer the proved dough into the pot.
Pop the lid back on and return to the oven.
Bake for 30 mins then remove the lid and bake for a further 10 mins.
Allow to cool - at least a little bit, before slicing into your loaf. A little rough around the edges may be, perhaps not quite the depth of flavour you'd get with a conventionally kneaded loaf, but crusty and delicious, nevertheless...
Wednesday, 18 June 2014
A Loaf of Fresh White Bread - a Random Recipe
I'll tell you the truth - there hasn't been much cooking going on around here - certainly not of the kind that I could in all conscience post up here. I mean, I have been cooking, but repetitive stuff, stuff I've made before, easy crowd pleasers.
Why?
Well, because if there was one thing Blue being ill taught me it was to live for the moment. Now that he's had the all clear, there seems to be even more reason to do so, and given that we've had lots and lots of this
which has led to lots more of this
you'll understand that a gal's thoughts haven't turned to the kitchen that often.
But still. It's been ages since I did a random recipe, and this is the 40th challenge set by Dom at Belleau Kitchen: take the 40th book on the shelf, turn to the 40th page and cook it.
Since the move, my cookery books have been even more dispersed than they were before, and of course, I no longer have my lovely shelf. I started counting in the kitchen and ended up at number 40 in the study with The River Cottage Family Cook Book by Hugh Fearnley Whittingstall and Fizz Carr.
This is not so much a recipe book of family food, as cooking and kitchen related projects for children to undertake. I like it, and it's good for back to basics stuff as well as more challenging projects, including things like making your own sausages, which we have done with the kids. It's got some good stuff about food politics, about reducing waste all that good stuff you'd expect from a book of this provenance, but it's not patronising or preachy.
I pretty much knew where page 40 was going to take me before I'd opened the book - somewhere in the 'Flour' section which includes gems such as home made pasta, sourdough and pastry. And what do you know, page 40 - plain and simple "A Loaf of Fresh White Bread". Actually, page 40 was the pictures, the recipe was on page 41.
I've never used this recipe, and to be honest, it includes both oil and sugar (or honey) which I've long since ommitted from my own bread making. But rules is rules, so I made up the dough using the ingredients specified.
Where I did deviate, though, was in the kneading (or not). I've become more and more aware of the 'no knead' method of bread making, and having had massive success with this to-die-for Cardigan Bay Buns temptation (which I urge you to try) using the no knead technique, I decided to try a Dan Lepard 'hardly any knead' version on this bread recipe.
It's a revelation: with barely any kneading - just a brief flurry of folds and turns every 10 minutes for half an hour, followed by a 45 minute rise, you get awesome bread. Every brief knead the dough take on more structure, the resulting loaf is light, the crust crusty, the crumb, well, crumby. Just right.
Andjust because I am a complete pig when it comes to fresh bread and couldn't contain myself in the interests of giving you the whole story, I had to sample the results of the almost no knead method in a scientific manner, I can attest to the fact that it tastes great...
Why?
Well, because if there was one thing Blue being ill taught me it was to live for the moment. Now that he's had the all clear, there seems to be even more reason to do so, and given that we've had lots and lots of this
which has led to lots more of this
But still. It's been ages since I did a random recipe, and this is the 40th challenge set by Dom at Belleau Kitchen: take the 40th book on the shelf, turn to the 40th page and cook it.
Since the move, my cookery books have been even more dispersed than they were before, and of course, I no longer have my lovely shelf. I started counting in the kitchen and ended up at number 40 in the study with The River Cottage Family Cook Book by Hugh Fearnley Whittingstall and Fizz Carr.
This is not so much a recipe book of family food, as cooking and kitchen related projects for children to undertake. I like it, and it's good for back to basics stuff as well as more challenging projects, including things like making your own sausages, which we have done with the kids. It's got some good stuff about food politics, about reducing waste all that good stuff you'd expect from a book of this provenance, but it's not patronising or preachy.
I pretty much knew where page 40 was going to take me before I'd opened the book - somewhere in the 'Flour' section which includes gems such as home made pasta, sourdough and pastry. And what do you know, page 40 - plain and simple "A Loaf of Fresh White Bread". Actually, page 40 was the pictures, the recipe was on page 41.
I've never used this recipe, and to be honest, it includes both oil and sugar (or honey) which I've long since ommitted from my own bread making. But rules is rules, so I made up the dough using the ingredients specified.
Where I did deviate, though, was in the kneading (or not). I've become more and more aware of the 'no knead' method of bread making, and having had massive success with this to-die-for Cardigan Bay Buns temptation (which I urge you to try) using the no knead technique, I decided to try a Dan Lepard 'hardly any knead' version on this bread recipe.
It's a revelation: with barely any kneading - just a brief flurry of folds and turns every 10 minutes for half an hour, followed by a 45 minute rise, you get awesome bread. Every brief knead the dough take on more structure, the resulting loaf is light, the crust crusty, the crumb, well, crumby. Just right.
And
Wednesday, 9 April 2014
Crust and Crumb: An introduction to sourdough and yeasted bread making with Vicky North
Making bread is one of the most basic pleasures of baking for me. It can also be one of the most frustrating, especially when I decide to 'just knock up a batch' in the morning, before the school run, only to find that I've got a 'wet dough' on my hands, and I end up dashing out of the door, sticky, quick drying dough all over my hands, up my arms, the end of my nose to get the kids to the bus on time... Fortunately, there was no such stress or bother, no deadlines to meet, no school buses to catch last Sunday when I arrived at Manor Deifi, tucked away up a winding lane above the village of Llechrydd, not far from Cardigan.
Over coffee and the most utterly delicious biscotti I think I have ever tasted (made by Vicky), those of us attending the course introduced ourselves and Vicky asked us to share our bread experiences. Despite the course title, none of us were complete bread novices: Tara, the youngest participant had made bread rolls at school, Kate mainly baked soda bread, Jason had perfected a low knead pizza dough which gives awesome results everytime (I'm going to try it!), Marianne bakes bread for the cafe/deli she owns. However, as with any skill, there is always more to learn, a different approach to absorb and we were all keen to get going.
The day is an introduction to sourdough and yeasted breads, and Vicky also incorporates soda bread which works well to show a speedy alternative to the more time-intensive loaves. We started off with a yeasted wholemeal loaf, weighing all ingredients (including the water) and using fresh yeast which is something I've never worked with before. Crumbling it in to the mixing bowl, it feels a little like plasticine, but not unpleasantly so. During the kneading process, Vicky introduced a new technique, as favoured by Bertinet, which involves slapping the dough down onto the worktop, folding it and slapping it down again. Very therapeutic - we were all keen to try it out! We moved on to soda bread, using buttermilk and bicarbonate of soda, and adding seeds to the dough, mixed up and kneaded a white bread dough, shaped the wholemeal loaf for proving and baking, experimented with the white bread dough making sesame-coated breadsticks and a fabulous tear and share cheesy garlic bread, and finally created a sourdough loaf all ready to take home, prove in the fridge, and bake the following day. All that plus a break for coffee and a delicious lunch, and yet at no point did the day feel rushed.
Vicky is hugely knowledgeable about the bread making process, and shares generously, answering questions and volunteering information - including a top tip for greasing tins using spray oil. The day was well organised and impeccably timed. Not only did we achieve everything the course promised, we had great fun into the bargain. On top of that, the bread we baked was truly fabulous - the mouthwatering smell of it wafted over us from Vicky's magnificent beast of a bread oven from the moment the soda bread went in until it was time to go home - and I can honestly say that I don't think I've baked better bread. As the Husband was going away, I froze the soda bread and the wholemeal loaf, when I got home, but the kids devoured the bread sticks and half of the garlic topped tear and share bread for their tea.The sourdough loaf went into the fridge to prove over night, and I fed my sourdough starter that Vicky sent us all home with.
The following day, as instructed, I baked my sourdough loaf. A little lopsided (still haven't fully got the hang of the oven I'm baking with), but gorgeous. Crusty on the outside, soft on the inside. Delicious with strawberry jam, tasty with tomato soup.
With my starter now happily in the fridge, and renewed confidence from the course, I am eager to get back in the sourdough groove, but I also think my use of more 'conventional' yeast will change - there will always be some sachets of quick yeast in the cupboard, but I will use more fresh yeast too. And finally, what I have learned is that a good loaf takes a little time. Not impossibly so, but I have been perhaps a little too slapdash in my approach to kneading - the benefits of a longer knead were much in evidence in the loaves I produced with Vicky. And as all these things are about sharing, I'm also keen to experiment with the low knead technique that Jason, one of the other participants, described, for pizza dough.
It's a brilliant day, and I think would have suited a novice just as well as someone with a little more experience. Perhaps you think it's a long way to come? Well, this is a beautiful holiday area, so it's perfectly possible to make a weekend or even a week of it. And if you were coming on holiday to the area anyway, this would be a perfect day to fit in. Vicky also runs courses for kids - and as it does tend to rain here, this would be a great thing to have up your sleeve.
Garlic, parmesan & herb tear & share loaf
To get a flavour (a delicious, garlicky cheesey flavour at that) of Vicky's baking, she has kindly agreed to let me pass on her recipe for the 'tear and share' bread. This was baked in a Bundt tin - something I have never got my head around for cakes on the basis that I'd be scared the batter would stick, but I will definitely be getting one because of the awesome results. By baking the bread in a high sided tin, it keeps the resulting bread beautifully soft. And I know sometimes you want crust, but sometimes, you want delicious, soft bread.
For 1 quantity of white bread dough (roughly a loaf's worth)
435g strong white flour
7g sea salt
7g fresh yeast, crumbled
230g tepid water
14g olive oil
You can find out more by visiting Vic North Bakes . If you're local to Cardigan, you can also take the opportunity to eat Vicky's delicious bread on a regular basis by joining her bread club.
I was delighted to accept an invitation from Vicky North to attend 'Crust & Crumb - an introduction to baking'.I was not required to write a blog post, and the opinions expressed are my own.
Over coffee and the most utterly delicious biscotti I think I have ever tasted (made by Vicky), those of us attending the course introduced ourselves and Vicky asked us to share our bread experiences. Despite the course title, none of us were complete bread novices: Tara, the youngest participant had made bread rolls at school, Kate mainly baked soda bread, Jason had perfected a low knead pizza dough which gives awesome results everytime (I'm going to try it!), Marianne bakes bread for the cafe/deli she owns. However, as with any skill, there is always more to learn, a different approach to absorb and we were all keen to get going.
| 'Super' seeded soda bread |
Vicky is hugely knowledgeable about the bread making process, and shares generously, answering questions and volunteering information - including a top tip for greasing tins using spray oil. The day was well organised and impeccably timed. Not only did we achieve everything the course promised, we had great fun into the bargain. On top of that, the bread we baked was truly fabulous - the mouthwatering smell of it wafted over us from Vicky's magnificent beast of a bread oven from the moment the soda bread went in until it was time to go home - and I can honestly say that I don't think I've baked better bread. As the Husband was going away, I froze the soda bread and the wholemeal loaf, when I got home, but the kids devoured the bread sticks and half of the garlic topped tear and share bread for their tea.The sourdough loaf went into the fridge to prove over night, and I fed my sourdough starter that Vicky sent us all home with.
The following day, as instructed, I baked my sourdough loaf. A little lopsided (still haven't fully got the hang of the oven I'm baking with), but gorgeous. Crusty on the outside, soft on the inside. Delicious with strawberry jam, tasty with tomato soup.
With my starter now happily in the fridge, and renewed confidence from the course, I am eager to get back in the sourdough groove, but I also think my use of more 'conventional' yeast will change - there will always be some sachets of quick yeast in the cupboard, but I will use more fresh yeast too. And finally, what I have learned is that a good loaf takes a little time. Not impossibly so, but I have been perhaps a little too slapdash in my approach to kneading - the benefits of a longer knead were much in evidence in the loaves I produced with Vicky. And as all these things are about sharing, I'm also keen to experiment with the low knead technique that Jason, one of the other participants, described, for pizza dough.
It's a brilliant day, and I think would have suited a novice just as well as someone with a little more experience. Perhaps you think it's a long way to come? Well, this is a beautiful holiday area, so it's perfectly possible to make a weekend or even a week of it. And if you were coming on holiday to the area anyway, this would be a perfect day to fit in. Vicky also runs courses for kids - and as it does tend to rain here, this would be a great thing to have up your sleeve.
Garlic, parmesan & herb tear & share loaf
To get a flavour (a delicious, garlicky cheesey flavour at that) of Vicky's baking, she has kindly agreed to let me pass on her recipe for the 'tear and share' bread. This was baked in a Bundt tin - something I have never got my head around for cakes on the basis that I'd be scared the batter would stick, but I will definitely be getting one because of the awesome results. By baking the bread in a high sided tin, it keeps the resulting bread beautifully soft. And I know sometimes you want crust, but sometimes, you want delicious, soft bread.
For 1 quantity of white bread dough (roughly a loaf's worth)
435g strong white flour
7g sea salt
7g fresh yeast, crumbled
230g tepid water
14g olive oil
For the Garlic Butter with Parmesan and Italian Herb topping:
100g butter, melted
1 egg, beaten
25g Parmesan cheese, grated finely
2 cloves garlic, grated
1/2 tsp salt
1 tsp dried Italian herb
Bundt tin
Spray oil for greasing the tin (a personal favourite!)
Mix and knead one quantity of dough:
- Weigh all the ingredients into a bowl and work together with a bread scraper initially (if you have one).
- Splash the work top with a little water (not flour!), and tip the rough dough out onto the work surface and start kneading.
- Knead the dough for 10-15 minutes by hand until you have a beautiful smooth and stretchy dough.
- Scrape out the mixing bowl then return the ball of dough to the bowl, cover with clingfilm and leave in a warm place to prove for one hour.
Meanwhile
prepare the topping - in a small bowl, mix the melted butter, egg,
Parmesan, garlic, salt and dried herbs altogether and set aside.
When the dough has doubled in size, roughly after an hour, tip out onto your work surface and divide into 12 equal boules.
Dip
each one into the garlicky butter, cover well and pop into the bundt
tin.
Drizzle any remaining butter over the nestling boules and then
place the tin into a large plastic bag. Seal and place in a warm spot,
ready to prove for a good forty minutes, until the dough is voluminous
and noticeably increased in size.
Bake at 190C for 30-40 minutes until risen and
golden brown. Allow to cool for five minutes before tipping out and
placing on a wire rack. You will have a deliciously tender crumb to your
bread as the dough has steamed as it's baked, thanks to the high sides
of the bundt tin which traps the moisture in as your bread bakes.
You can find out more by visiting Vic North Bakes . If you're local to Cardigan, you can also take the opportunity to eat Vicky's delicious bread on a regular basis by joining her bread club.
I was delighted to accept an invitation from Vicky North to attend 'Crust & Crumb - an introduction to baking'.I was not required to write a blog post, and the opinions expressed are my own.
Friday, 22 March 2013
Malted grain, multiseeded sourdough loaf - for friends
There, you see, I haven't forgotten all about bread, although I'm eating less of it in my attempt to fit into my clothes better. That's as may be, but on Saturday night we have people coming for dinner. I told you I was going to get some mileage out of this!
I love having people round for meals, although we don't do it that often. It's the opportunity to think a bit more carefully than usual about what we might eat, and an excuse to fiddle around in the kitchen even more than normal.
I'm doing some dippy, mezze type things for a starter - going to give some Pistachio Dukka a go, and may be re-run the Cambodian Wedding Day dip that was such a massive hit a few months ago. There may also be some hummus involved - lemony, ordinary, and beetroot and walnut. These will all be courtesy of Hugh F-W and the wonderful Veg Everyday which I'm still finding hugely inspirational.
To go with of course, I need bread. I could do flatbreads on the day, but however impressive, the thought of flinging dough and flour around at the last minute to make them fresh (which is when they are best) when I could be hustling the kids into bed, hoovering the dog and trying to find some matching cutlery serenely sipping a G&T as I apply the final touches to my make up (does anyone do that? Please let me know if you do!) is not appealing to me at the moment so I am breaking out my sourdough starter to make some proper sourdough bread for the occasion.
This is as opposed to the yeasted loaves I've been making, which I wrote about a couple of months back. This method uses no dried yeast, and just uses the starter as the raising agent. I'm following the method that I learned on my fantastic River Cottage Christmas baking course taught by Aiden Chapman, when we made a delicious cranberry and orange loaf using this method. It is as easy as can be - barely any kneading, more loving stirring, then some folding, over the course of a few hours. The dough can then be proved in the fridge for up to 3 days - and indeed Aiden recommends this to allow the dough to develop more flavour. On the Bread course, we didn't have the opportunity to test this out but the bread was still mighty fine.
A word of warning now, though - If you've got people coming for dinner on Saturday and don't have a sourdough starter going, you're not going to be able to join in I'm afraid, but for easy instructions on making a starter, the post I wrote is here. May be next time. And while we're talking about time, you will need to be able to tend to your dough once an hour over a 5 hour period. The dough can then sit in the fridge for 3 days (as I said above) ready to be baked as you want it.
As my starter had been languishing in in the fridge for a few days, I got it out on Tuesday, got it up to room temperature, chucked half of it away. added some more flour (I used rye) and water to get it going, gave it a good stir and left it to do its thing till Wednesday morning.
For 500g flour, you will need 10 g salt, 125g of your starter and 325g water. You can add in any extras you want.
Malted grain, multiseeded sourdough loaf
1kg malted grain flour (I had some Doves Farm in the cupboard)
20g salt
100g mixed pumpkin seeds, sunflower seeds and sesame seeds
250g sourdough starter
650g water
Put all the dry ingredients in a bowl and stir together. Combine the starter and water, and then carefully mix into the dry ingredients.
Cover the bowl with a tea towel and leave. Yes, that's right, no kneading required!
An hour or so later (actually, I ended up leaving mine for closer to 2 because I had to take the kids to school and walk the dog), literally all you need to do is remove the tea towel, and fold the dough over on itself, then press gently back into the bowl.
Cover and leave for another hour, when you fold the dough again and leave for another hour. Each time you do this you will see that the dough is getting smoother and more coherent as the gluten develops
After the last fold. leave the dough for 2 hours, then tip the dough out on a floured surface and shape it into a round. Leave for 20 minutes.
If you have a suitable proving basket, use that. As I wanted to make one big loaf and my proving basket isn't big enough, I lined a bowl with a tea towel and chucked some flour around liberally.
then shape the dough into a tight ball and pop it in your basket/bowl.
At this point you need to leave your bread to prove for at least 4 hours but you can put it in the fridge for up to 3 days to develop the flavour.
When you are ready to bake, if the dough has been in the fridge, get it out and bring the dough up to room temperature.
Pre-heat the oven to 220C, and put a baking sheet in to heat up. As with the yeasted loaf, have some semolina to hand to dust the hot baking sheet and also a sprayer bottle with some water in (or a bowl of water to splash round with your hand). You'll need a sharp knife nearby too.
When the oven is at temperature, bring out the baking sheet, dust with semolina and carefully tip the dough on to it. Slash the top of the dough with your sharp knife and get it all back in the oven. The quicker you can do this without sustaining third degree burns, the better... Bake the bread for 20 minutes, then turn it in the oven and bake for another 15 minutes before doing the tap on the bottom thing. if it's sounding hollow, your bread is baked.
Leave to cool on a rack for as long as you can bear before slicing and eating.
I love having people round for meals, although we don't do it that often. It's the opportunity to think a bit more carefully than usual about what we might eat, and an excuse to fiddle around in the kitchen even more than normal.
I'm doing some dippy, mezze type things for a starter - going to give some Pistachio Dukka a go, and may be re-run the Cambodian Wedding Day dip that was such a massive hit a few months ago. There may also be some hummus involved - lemony, ordinary, and beetroot and walnut. These will all be courtesy of Hugh F-W and the wonderful Veg Everyday which I'm still finding hugely inspirational.
To go with of course, I need bread. I could do flatbreads on the day, but however impressive, the thought of flinging dough and flour around at the last minute to make them fresh (which is when they are best) when I could be
This is as opposed to the yeasted loaves I've been making, which I wrote about a couple of months back. This method uses no dried yeast, and just uses the starter as the raising agent. I'm following the method that I learned on my fantastic River Cottage Christmas baking course taught by Aiden Chapman, when we made a delicious cranberry and orange loaf using this method. It is as easy as can be - barely any kneading, more loving stirring, then some folding, over the course of a few hours. The dough can then be proved in the fridge for up to 3 days - and indeed Aiden recommends this to allow the dough to develop more flavour. On the Bread course, we didn't have the opportunity to test this out but the bread was still mighty fine.
A word of warning now, though - If you've got people coming for dinner on Saturday and don't have a sourdough starter going, you're not going to be able to join in I'm afraid, but for easy instructions on making a starter, the post I wrote is here. May be next time. And while we're talking about time, you will need to be able to tend to your dough once an hour over a 5 hour period. The dough can then sit in the fridge for 3 days (as I said above) ready to be baked as you want it.
As my starter had been languishing in in the fridge for a few days, I got it out on Tuesday, got it up to room temperature, chucked half of it away. added some more flour (I used rye) and water to get it going, gave it a good stir and left it to do its thing till Wednesday morning.
For 500g flour, you will need 10 g salt, 125g of your starter and 325g water. You can add in any extras you want.
Malted grain, multiseeded sourdough loaf
1kg malted grain flour (I had some Doves Farm in the cupboard)
20g salt
100g mixed pumpkin seeds, sunflower seeds and sesame seeds
250g sourdough starter
650g water
Put all the dry ingredients in a bowl and stir together. Combine the starter and water, and then carefully mix into the dry ingredients.
Cover the bowl with a tea towel and leave. Yes, that's right, no kneading required!
An hour or so later (actually, I ended up leaving mine for closer to 2 because I had to take the kids to school and walk the dog), literally all you need to do is remove the tea towel, and fold the dough over on itself, then press gently back into the bowl.
Cover and leave for another hour, when you fold the dough again and leave for another hour. Each time you do this you will see that the dough is getting smoother and more coherent as the gluten develops
After the last fold. leave the dough for 2 hours, then tip the dough out on a floured surface and shape it into a round. Leave for 20 minutes.
If you have a suitable proving basket, use that. As I wanted to make one big loaf and my proving basket isn't big enough, I lined a bowl with a tea towel and chucked some flour around liberally.
then shape the dough into a tight ball and pop it in your basket/bowl.
At this point you need to leave your bread to prove for at least 4 hours but you can put it in the fridge for up to 3 days to develop the flavour.
When you are ready to bake, if the dough has been in the fridge, get it out and bring the dough up to room temperature.
![]() |
| After 2 days in the fridge |
Pre-heat the oven to 220C, and put a baking sheet in to heat up. As with the yeasted loaf, have some semolina to hand to dust the hot baking sheet and also a sprayer bottle with some water in (or a bowl of water to splash round with your hand). You'll need a sharp knife nearby too.
When the oven is at temperature, bring out the baking sheet, dust with semolina and carefully tip the dough on to it. Slash the top of the dough with your sharp knife and get it all back in the oven. The quicker you can do this without sustaining third degree burns, the better... Bake the bread for 20 minutes, then turn it in the oven and bake for another 15 minutes before doing the tap on the bottom thing. if it's sounding hollow, your bread is baked.
Leave to cool on a rack for as long as you can bear before slicing and eating.
Friday, 1 February 2013
Forever Nigella 22 - Food to Cherish Your Loved Ones - the Round Up
Well, I knew hosting a Forever Nigella would be a great way to start 2013 for me, and I wasn't wrong. I've been introduced to some lovely blogs that hadn't read before, and some of my old favourites have also contributed.
First up, Caroline Makes... included this delicious Tiramisu from Nigelissima as part of a special New Year's Eve meal for her boyfriend. Like Caroline, I also received Nigelissima for Christmas but I'm yet to make anything from it. It won't be long...
Next, the lovely Annie from one of my favourite food blogs Scrummy Suppers and Quirky Cakes entered the Old Fashioned Chocolate Cake from Nigella.com. Annie has made this cake on a number of occasions and it's never let her down - her cakes look pretty amazing, so I can see why she goes back to the recipe when she needs a cake to make someone feel special.
The great Miss Flash at Food Glorious Food went down the bread route, taking inspiration from my favourite Nigella tome, How to be a Domestic Goddess. Based on a maple syrup and pecan loaf, Miss Flash made maple Syrup and pistachio loaf and mighty good it looks too.
Louise at Crumbs and Corkscrews, a blog I hadn't come across before cooked the most amazing looking flourless brownies from Nigella Express. She substituted white chocolate chunks and cherries for the nuts, and used Baileys in the chocolate sauce instead of camp coffee. Sounded like pretty good substitutions to me, and just the thing to cheer someone up after, say, completing the dreaded tax return....
Another droolsome chocolate cake next: Devils Food Cake from Nigella.com from another blog new to me: Garden, Tea, Cakes and Me. Doesn't it look wondeful? I know my family and friends would feel cherished if I served up something like that.
Another cherry & white chocolate combo (which happens to be a favourite of mine), this time in the shape of lovely Banana, Cherry and White Choc Chip Muffins made by Katharine who writes the beautiful Leeks & Limoni blog. Her muffins look totally scrummy, and I embrace her philosophy for January which is "A little bit of what you fancy", rather than total denial, to get through the post-Christmas blues.
Choclette who writes the fantastic Chocolate Log Blog entered Parmesan Shortbreads which she made for a Christmas lunch which took place on 19th January as the result of a quirky family tradition.
Another savoury recipe, this time a gorgeous looking chicken tagine made by Jen at Blue Kitchen Bakes. She made this delicious looking dinner for her boyfriend. Lucky boyfriend, is what I say.
I couldn't host this event and not enter these myself. back to How to be a Domestic Goddess then, for the Norwegian Cinammon Buns. These are what I bake for the Husband, kids and any other family members or friends that need cherishing...
Stacy at Food Lust People Love made another Nigelissima soon to be classic - the Meatzza . I certainly remember Nigella making this in the TV series and thinking I would have to try it myself. Well if Stacy's version is anything to go by, this is going into my meal plan sooner rather than later.
Another Nigelissima recipe - this time a delicious looking chocolate mousse entered by the founder of Forever Nigella, Sarah over at Maison Cupcake. It looks totally rich and decadent - just the sort of thing to make a loved one feel cherished.
Finally, Sam at The Yorkshire Bakery entered some delicious chocolate cherry cupcakes from How to be a Domestic Goddess.
So there we have them - I think you'll agree all fantastic offerings to cherish your loved ones with - but then, that's one of the things Nigella does best, in my view...
The next Forever Nigella will be Nigella Nostalgia to be hosted by Urvashi at The Botanical Baker
Subscribe to:
Posts (Atom)